Search This Blog

Wednesday, January 26, 2011

Tator Tot is Born

Finally, our baby Tator Tot is finished! He is a happy healthy monkee based on Monkee Maker's pattern.

My next monkee will be created on the USM.


I'm proud to say that his last stitches were formed while I was watching a Metallica biography.

Ok... this is not Tator Tot... but this is the look I get when she thinks that she is right and I am wrong.

Eden seems to think I may be off my rocker since I told her that Tator Tot is technically her uncle... yet he is a monkee's uncle.... see the looks I get when I try to have a deep meaningful convo with my grandmonster?

Monday, January 24, 2011

Little Red Cape Pattern (Photo Heavy)

This is the first time I have every written out a USM or any pattern. Please read carefully and ask for clarification if you need to.

Hood

KP#3 throughout the project

PF (pull forward) 80 needles

Hang rag hem or weighted hem

Knit 8-18 rows WY (waste yarn)

Knit 16 rows of main yarn

Using the transfer tool pick up the beginning loops and hang them on the working needles to create a casing.


Reset RC (Row Counter) to 000

Knit 44 rows of MY (main yarn)

Bind off using a crochet bind off (closed)

Fold the rectangle in half and Kitchener-stitch the edge opposite from the casing.

Mark the center of the back/bottom of the hood where the row of Kitchener meets the back edge with a stitch marker or contrasting yarn.

Mark the center point between the Kitchener row and the join of the casing with a stitch marker or contrasting yarn on both sides of the bottom edge of the hood.


Back

PF (pull forward) 110 needles

Hang rag hem or weighted hem

Knit a few rows WY (waste yarn)

Reset RC (Row Counter) to 000

(Optional eyelet row– knit 4 rows, create eyelets as desired. My eyelets are 5 needles apart. Continue to knit to row 80)

Knit 80 rows of MY (main yarn)

Decrease stitches to EON (every other needle)

Move stitches over so that there are no empty our out-of-work needles

Knit 10 rows

Bind off using a crochet bind off (closed)


Mark the center of the back at the top edge with a stitch marker or contrasting yarn. This is where the center hood and center back will attach.

Remove rag hem and WY

Front

PF (pull forward) 110 needles

Hang rag hem or weighted hem

Knit a few rows WY (waste yarn)

Reset RC (Row Counter) to 000

(Optional eyelet row– knit 4 rows, create eyelets as desired. My eyelets are 5 needles apart. Continue to knit to row 50)

Reset RC (Row counter) to 000

Right upper side of front

This will create a slit in the middle of the upper front

PF (pull forward) 55 needles on the left side of the front piece to FNWP (forward non-working position).

Knit 30 rows of MY (main yarn) adjust weights accordingly.

Row 31 - Decrease EON (every other needle).

Move stitches over so that there are no empty out-of-work needles

Knit 10 rows

Bind off using a crochet bind off (closed) but leave the right side of the front piece on the needles. PF (pull forward) the needles to FNWP (forward non-working position)

Reset RC (Row counter) to 000

Left upper side of front.

Push the 55 needles on the left side of the front piece to FWP (Forward Working Position).

Knit 30 rows of MY (main yarn) adjust weights accordingly

Row 31 - Decrease EON (every other needle)

Move stitches over so that there are no empty out-of-work needles

Knit 10 rows


Bind off using a crochet bind off (closed)

Joining

(Right sides together) - Match the Hood center bottom with the Back center bottom and sew together using a modified mattress stitch.


CE (casing edge)
M (stitch marker)
CM (center marker) (also marks Kitchener row on bottom edge of the hood)
FLS (first left stitch of a row)
FRS (first right stitch of a row)
CFS (center front split)

Bottom edge of Hood

CE………………..M………………..CM………………..M………………..CE

Top edge of the Back

FLS………………..M………………..CM………………..M………………..FRS


1. Match the Hood bottom edge and the top of the Back here. Remember that the outer ¼ edges of the hood are to be seamed with the front of the cape.

(seam here)
  CE………………..M………………..CM………………..M………………..CE
FLS………………..M………………..CM………………..M………………..FRS


2. With the knit side (right side) facing you, seam the Back and Front shoulders together.

   (seam here)                                                            (seam here) 
       FLS………..HOOD & CENTER BACK SEAM…………..FRS
       FLS………..………........……..CFS.…….……....…..………….FRS

3. Stitch the remaining ¼ edges of the Hood bottom to the remaining inner edges of the Front on either side of the CFS (center front split)
DO NOT seam the casing to the front, but leave it extended over the edge of the center front split.

                               (seam)          (seam)
FLS………..………........……..CFS.…….……..…..………….FRS

4. Blanket stitch the side seams of the Front and Back

5. The shoulders will have a sharp corner, which I stitched down to give a soft curve to the shoulder. This area can also be trimmed, add epilates, etc.

6. CFS (center front split) Beginning on the left side of the CFS at the base of the Hood, sc (single crochet) to the end of the CFS on the right side. Chain 1, turn and sc in the next 3 sts (stitches), chain 4, skip the next 4 sts and sc in the next 8 sts, sc in the remaining sts of the CFS slst (slip stitch) in the last sc. Crab stitch to finish the edge of the CFS placket.


Sew the buttons onto the left side of the placket. This is a garment for a female so the placket should have a right-over-left flap (if you are wearing the garment, the right flap will lap over the left side. The buttons will be on the left side. 


REMEMBER: I used large buttons. Adjust the number of buttonholes and the size of the buttonholes to your buttons.


Trim

Bottom of the cape trim

Trim color yarn (white) sc 1 row. Crab stitch 1 row.


Edge of hood trim

Where the casing is folded (face edge), sc between the knit stitches for 1 row. Crab stitch 1 row.


I-Cord

I don’t use a rag hem for the I-Cord tie.

PF 4 needles and double ewrap cast on. Hang some weight and knit the length of cord desired. Bind off. I use the yarn tails to do a quick 1” seam along the beginning and ending of the I-Cord. Pull it through the Hood casing and steam the cape.




Saturday, January 22, 2011

Spending Time with CoCo

Today I was able to combine some of my favorite things... spending time with my beautiful CoCo and playing with yarn!

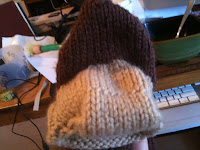
I completed a yarmulka based on Cynthia's spiral hat video.

The photo is terrible!
and... CoCo is learning to crochet...

CoCo and her first Grannie Square


Friday, January 21, 2011

Eden's Cape Day 4 FINISHED!

Eden Lee

I'm glad to have this one finished. Red was Grannie Prince's favorite color, not mine! I like a splash of it now and then and I like red roses, but too much red irritates me. I could never work at Target, even shopping there can get me wired and I usually come out of there with a "red overload headache".
The buttons are reclaimed from jacket approximately 30 years old. 

Crocheted button hole


Eden's Cape Day 3

I decided this version of the cape should be constructed in three pieces (front, back, and hood). Then Eden decided it needed some white trim.
Yes, Meka has her head on a pillow. She is such a spoiled baby.

I spent most of my Thursday 11-11 weaving in yarn ends and crap-stitching. Couldn't get any photos to load.


Wednesday, January 19, 2011

Eden's Hooded Cape Update

I was pert near finished with Eden's cape and decided that I did not like the direction it was taking. So... Yep I ripped it our and started over.


Big Daddy downloaded "The Wire" and I worked on Tator Tot through a couple of episodes.

BlogBooster-The most productive way for mobile blogging. BlogBooster is a multi-service blog editor for iPhone, Android, WebOs and your desktop

Tuesday, January 18, 2011

Little Red

Wow! It is after 10 PM and I am just now finishing up an assignment for school.

I did get a few rows in this morning on Tator Tot and started a red hooded cape-thingie for Eden. Over all, it was a frustrating mess!


The was a weekend of darkness and misty weather, the dogs tracking muddy paw prints on my hardwood floors and O my aching back! I did manage to get the floors steam-mopped.

Hey, looks like I was not as unproductive as I thought... GO ME!

Monday, January 17, 2011

Tank Top for Eden

This has been a very dark, very could have been dreary weekend. I know technically, the weekend was over yesterday. Big Daddy was off from work and the kids off from school so I'm call'n it the weekend. Eden was looking at my yarn and picked out a variegated skein that I had purchased to make another tam. She needs another hat like... well... This is what we came up with for my 11-11 project for today.


The yoke an body are knitted separately and then kitchener stitched together. 
GRRRRRRRRRR!!!! It is simply too dark to get a good picture of the tank.

The second row has a few eyelets to give a soft scallop to the bottom.  Then I single crocheted a row along the edge followed by a row of crab-stitch.

The photo is too dark to see the detail... I just had to use it for the Cutie Pie in the pic.

The neckline has a row of single crochet and a row of crab-stitching. The sleeves have a single row of crab-stitching.

The back of the neckline is lower than the front.

Sunday, January 16, 2011

Tator Tot is my 11-11 excuse to fondle, bend, twist, and caress fibery goodness today.

Heather has issued a "fibery goodness" challenge that is designed to get one's Mojo back. I'm in... not sure if I ever had Mojo and I'm not sure what Mojo we're tawk'n about but I WANT MOJO DAMMIT!!

Heather's rule of engagement (Yep, I smurfed em... )


1) I will spend 11 Minutes in pursuit of Fibery Goodness EVERY DAY of 2011.
2) I will make notes and blog entries detailing each day’s pursuit.
3) Thinking about knitting without a specific project will not count.
4) Spinning, hand knitting, crochet, yarn shopping, meeting attendance, class preparation, class time, fiber bearing animal and plant care and collection all count!
5) Reading counts but only if it is pattern, technique, or industry related. Reading a Debbie Macomber book does not count, sorry!
6) Posts must be made daily.
7) Writing blog entries does NOT count!
8)8) In the event of my death, maiming, dismemberment or significant illness a Doctor’s note will be provided!
9) No quitting just because the MOJO seems to be back.
10) Napping with or blankly staring at yarn, tools and books does not count.
11) Failure is not an option.


I haven't settled on my own rules just yet... I'm tired cuz I stayed up until 3 A.M. watching the last season of Dexter. My back was hurting too much to lay down. WHINEEEEEE

Tator Tot is my 11-11 excuse to fondle, bend, twist, caress,  fibery goodness today.


I have been working on Tator Tot off and on for about two weeks. When the grandmonsters are napping I don't use the USM because the click-click-pop-click is not conducive to speeding up the winding down processes. I do tend to Bondercise quickly! So, I work on hand-knitting projects and Tator Tot is what is filling my relax knitting time.

HE IS TAKING FOREVER!
Tator Tot legs & feet

Tator Tot hands

Saturday, January 15, 2011

The Idiot String

When I have multiple items to knit on my USM that require the same weight and approximately the same number of needles, I will piggy back the knitted pieces to save time and work more economically.

This works well when I have a set of dishtowels, dishrags, etc.

There are few ways to accomplish this task without having to rehang the hem or knit waste yarn over and over and over…

I usually start out by hanging my rag hem and then knitting about 8 to 10 rows of WY. If there is not much yarn I will knit it all to avoid cutting it into shorter un-reusable pieces.

Then I knit 1 row of yarn (or ravel cord) that I call idiot string, some call it pull-row, release-row, or slip-row. Why I call it idiot string? Because when I forget to knit it in, I smack myself in the head and say “Idiot! String?”

Mamma would really be upset with me if she knew about this little conversation that I have with myself because she never let us use the words: idiot, stupid, and fool. But, we won’t tell Mamma now will we?… grrrrrrrrrrrrr

How many items that I plan to knit will determine the number of idiot strings I will add to my beginning WY. There are times that I only knit one idiot string and have faired well with it.

Let’s say I am going to knit four pieces so I would begin in this way

Rag hem – waste yarn, idiot string, idiot string, idiot string, and idiot string.

Then I would use a double e-wrap, crochet cast on, or any other cast on that my project required. Then knit my first piece. Cast off in the desired method.

Now, instead of ripping out the idiot string and the waste yarn to remove the knitted piece, then re-hanging the rag hem, knitting the waste yarn and another idiot string—I simply pull up the beginning of the knitted piece and re-hang the next row of idiot string (make sure the knitted piece is hanging to the back of the hem. Cast on for your next piece and knit!


The original knitted piece is laying behind the newly added piece.
Another method I use is to complete the first piece, then add some waste yarn or another idiot string and cast on the next piece. This works really well when knitting small items like dishrags assembly line style.

Crochet cast of using the latch tool. Leave the knitted piece on the USM

Knit 8 to 10 rows of contrasting waste yarn.

Cut the waste yarn
Afterthought Idiot String - Pull out the loop on the right end (or left end) opposite of the end of the waste yarn.

Cast on the second piece.

Push the cast on row against the waste yarn and USM bed, push the needles into forward working position and make sure that the latches are open.

Knit the desired number of rows


Cut the loop on the opposite side of where you cut the last row of waste yarn.

Pull each end of the Afterthought Idiot String at the same time

Then pull from one side or the other GENTLY DAMMIT!

The knitted piece will begin to separate from the waste yarn.

Now remove the waste yarn.

TA DA!!